Everyone has a little bit different way of posting ears. This is the method I use and I'm posting my 4 month old puppy as an example. This should work on younger as well as older puppies, although you may need to adjust the backer rod size 3/8, 1/2, or 5/8" depending on your pup's age. I recommend starting with a tired or sleepy puppy so you have less squirming. You can have someone hold the puppy in a sitting position between their knees facing you while you tape or put him up on a grooming table with a slip lead. After a few post jobs your puppy will enjoy having his ears posted and he will just sit there for you.
Before your start posting your puppy's ears the stitches should be removed and the cut edges of the ears should be fully healed with NO SCABS.
You will need to re-post your puppy's ears every 4 or 5 days or as soon as possible if they are to get wet and you need to continue posting your puppy's ears through the teething stage at the minimum (approximately 6 months old). If your posts pop out of the ears after posting it's likely 2 things- the backer rod is too big or you didn't push it down in far enough. In either case they need to be re-posted immediately when this happens. The down time between postings when you let your puppy's ears air out should only be about 30 minutes.
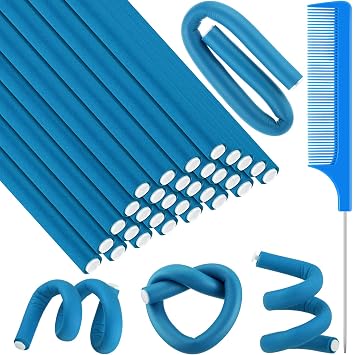
To post ears you will need the following:
Foam backer rod from the hardware store. I am using 1/2" here
Duct tape, Gorilla tape, Or T-rex tape
Johnson and Johnson's Zonas tape
Medicated powder in a ziploc back and in a bottle. I like Neo-Predef from my vet
Zip ties
Scissors
Gauze
Scotch double sided tape (not pictured until later)
![Image]()
To start, cut a piece of backer rod several inches longer than each ear. 8 or 9 inches is usually plenty.
Cut a section of duct tape and with it laying face up stick it to the edge of the backer rod, leaving about 1/4 or 1/2" of foam exposed at the bottom. Cut the zip ends off of two zip ties and lay them approximately 3/4" apart from each other on the tape. They can start about 1/2" up from the bottom edge where the duct tape starts.
![Image]()
Tightly roll the tape onto the post
![Image]()
![Image]()
Cut off the excess from the zip ties.
![Image]()
Roll on one more layer of duct tape or until it's the desired stiffness.
![Image]()
![Image]()
Put a strip of double sided tape onto each post
![Image]()
![Image]()
Get your roll of zonas tape with the sticky side facing OUT stick it to the double sided tape at the bottom, just above the exposed foam.
![Image]()
Continue rolling the Zonas tape, sticky side out, overlapping slightly, up to the end of each post.
![Image]()
![Image]()
This next step is optional, and I will explain. If you notice that your puppy's ears are "overstanding", so they tip inward, even just slightly, I recommend adding a "bumper" to your posts. It is hard to see, but the left ear on my puppy is just slightly tilting in at the base of his head so I will use bumpers on each ear post to help correct this.
![Image]()
To make the bumpers, cut about a 1" section of backer rod and slice it in half length wise.
![Image]()
Stick it to the already back taped post.
![Image]()
Wrap it on tightly with Zonas tape, again, with the tape facing sticky side outwards.
![Image]()
Next, cut two small strips of gauze and overlap them in an X pattern. Also cut a 2" long piece of Zonas tape, and cut it lengthwise in two thin strips.
![Image]()
Set the end of the post down on the middle of the gauze X
![Image]()
Pull each end up over and stick it to the post, covering the exposed foam.
![Image]()
Use the small strip of zonas tape and tape the gauze where it meets the post. The sticky side faces IN here.
![Image]()
Here are your two posts at this point.
![Image]()
Dip the end of each post into your ziploc bag and coat the gauze with powder.
![Image]()
Before your start posting your puppy's ears the stitches should be removed and the cut edges of the ears should be fully healed with NO SCABS.
You will need to re-post your puppy's ears every 4 or 5 days or as soon as possible if they are to get wet and you need to continue posting your puppy's ears through the teething stage at the minimum (approximately 6 months old). If your posts pop out of the ears after posting it's likely 2 things- the backer rod is too big or you didn't push it down in far enough. In either case they need to be re-posted immediately when this happens. The down time between postings when you let your puppy's ears air out should only be about 30 minutes.
To post ears you will need the following:
Foam backer rod from the hardware store. I am using 1/2" here
Duct tape, Gorilla tape, Or T-rex tape
Johnson and Johnson's Zonas tape
Medicated powder in a ziploc back and in a bottle. I like Neo-Predef from my vet
Zip ties
Scissors
Gauze
Scotch double sided tape (not pictured until later)

To start, cut a piece of backer rod several inches longer than each ear. 8 or 9 inches is usually plenty.
Cut a section of duct tape and with it laying face up stick it to the edge of the backer rod, leaving about 1/4 or 1/2" of foam exposed at the bottom. Cut the zip ends off of two zip ties and lay them approximately 3/4" apart from each other on the tape. They can start about 1/2" up from the bottom edge where the duct tape starts.

Tightly roll the tape onto the post


Cut off the excess from the zip ties.

Roll on one more layer of duct tape or until it's the desired stiffness.


Put a strip of double sided tape onto each post


Get your roll of zonas tape with the sticky side facing OUT stick it to the double sided tape at the bottom, just above the exposed foam.

Continue rolling the Zonas tape, sticky side out, overlapping slightly, up to the end of each post.


This next step is optional, and I will explain. If you notice that your puppy's ears are "overstanding", so they tip inward, even just slightly, I recommend adding a "bumper" to your posts. It is hard to see, but the left ear on my puppy is just slightly tilting in at the base of his head so I will use bumpers on each ear post to help correct this.

To make the bumpers, cut about a 1" section of backer rod and slice it in half length wise.

Stick it to the already back taped post.

Wrap it on tightly with Zonas tape, again, with the tape facing sticky side outwards.

Next, cut two small strips of gauze and overlap them in an X pattern. Also cut a 2" long piece of Zonas tape, and cut it lengthwise in two thin strips.

Set the end of the post down on the middle of the gauze X

Pull each end up over and stick it to the post, covering the exposed foam.

Use the small strip of zonas tape and tape the gauze where it meets the post. The sticky side faces IN here.

Here are your two posts at this point.

Dip the end of each post into your ziploc bag and coat the gauze with powder.